A DIY Garden Path is an aisle that leads you towards a beautiful flowery end, where the sight of blossoms and soul soothing floral aroma awaits you. Isn’t it wonderful?
However, to fully achieve this kind of experience, it should begin with an enticing path that walks you through a garden and/or your yard.
Garden Path Mosaic Making Wind Patterns
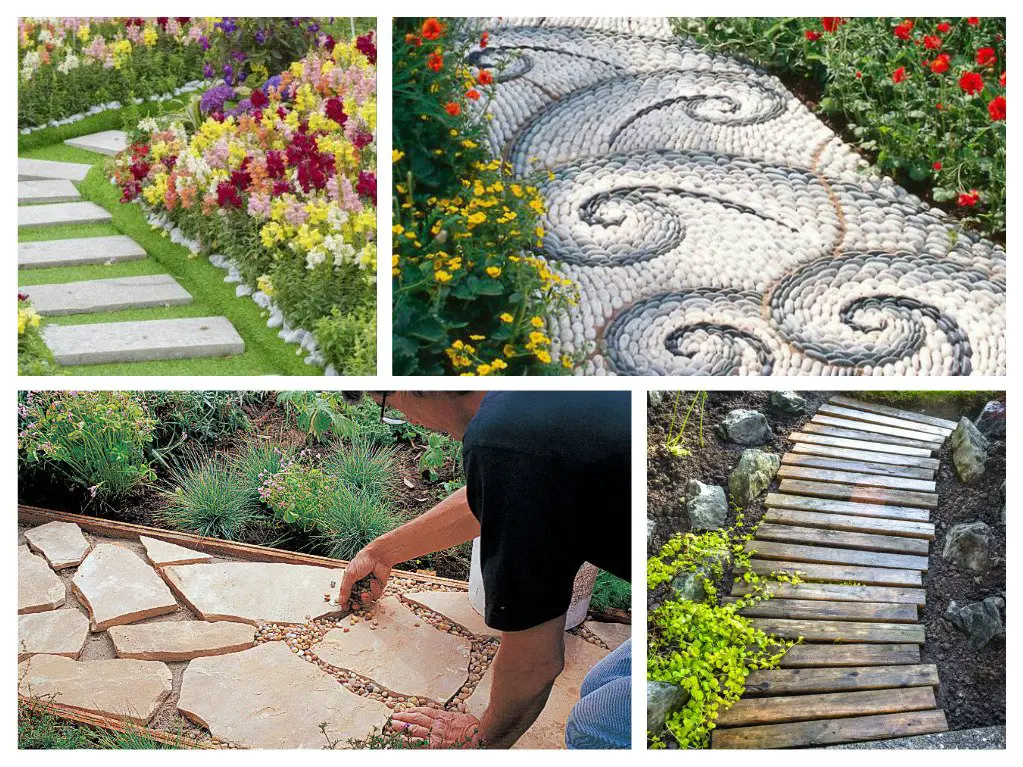
Garden Path Mosaic Making Wind Patterns / beesandroses.comIf you’re looking for an outdoor project that’s a bit off the beaten path, a pebble mosaic will give your yard, garden, or walkway a unique and unexpected focal point. Though the materials to build it are pretty basic—flat pebbles or cobbles from a stone yard (or ordered online); concrete mix, gravel, and stone dust for the base—your design can be anything but.
Garden Path Mosaic Making Wind Patterns 2You can also check a nice tutorial on how to make pebble mosaic. It is really simple and the results are awesome 🙂
Install DIY Flagstone Path
A pretty stone path enhances the overall beauty of your garden.You can find the easy step-by-step instructions to install your own path in a weekend here!
To finish, fill cracks between stones with gravel, or ― to hold flagstones more firmly ― use something smaller like decomposed granite.Backyard Flagstone Pathway

Get the tutorial at Bridget and Bear

Related: Get the Ideal Paving Material and Also Consider the Paving Style
Salvaged Wood and Pebbles Garden Path Design
The boards in this post came from a big pile of torn apart crates and pallets.Get the tutorial at Funky Junk Interiors
Concrete Staircase
Get the tutorial at Ohio Thoughts.
total cost of approximately $1300.00. We are still amazed at how well our step frames turned outand we think it all looks amazing! / OHIO THOUGHTS
Beautiful Curving Pathway Garden with Diamond Pavers
Amazing Curving Pathway Garden with Diamond PaversAmazing Mosaic Garden Path

Recommended steps:
- Prep and Sort the Stones
- Lay Out the Mosaic
- Prep the Project Site
- Dampen the Concrete Mix
- Mark the Mosaic’s Shape
- Place the Center Stones
- Lay Stones Alongside the Center Stone
- Fill in the Pattern
- Set the Remaining Stones
- Spread the Topping Mix
- Saturate and Shape the Mix
- Let the Mosaic
Get the tutorial at Wonderful DIY .
Rectangular Pavers Flowers Garden

Cool Up-Sized Pot Decors

Unique Large Wood Cut Pavers
These Stepping Stones Are Designed As Large Wood Cut Pavers. They Create A Natural Look, Like A Real Tree Trunk Cut In Pieces.Amazing Log Garden Paths


Reclaimed Diy Brick Path Garden
Reclaimed Diy Brick Path GardenRed Brick Path on the Water
Red Brick Path on the WaterAffordable Garden Path Ideas
Our favorite walkway ideas for your landscape: Paths you can build in a weekend without breaking the bank or your back.

Tips for Building Mulch and Gravel Paths
- Rent a gas-powered sod cutter to remove grass if the path is long. For short paths, use a garden spade to slice off the sod.
- Set edging so it ends up about an inch above the fill material.
- Use a spacer stick cut to the width of the garden path as a guide when you set the edging or border. You won’t have to keep pulling out the tape measure to make sure the edges run parallel.
- Cover the soil with landscape fabric to deter weeds and prevent the fill material from mixing with the soil. Don’t use plastic. It’ll catch water and create a soggy path.
- Have gravel delivered, especially if you need more than a half ton.
- If you want a path that’s firm enough to roll a wheelbarrow on, use crushed stone and tamp it after leveling it. (Pea rock or other rounded stone won’t compact.) Use a hand tamper for short paths. Rent a vibrating-plate tamper for long paths.
You can find more amazing DIY gravel path ideas on familyhandyman.com
gravel path ideaLace Stepping stones

Sea-Themed Stones DIY Garden Path
Sea-Themed Stones DIY Garden PathConcrete Patterns

This elaborate patterned walkway is sure to impress.
Get the tutorial at Pennsylvania Gardener Newsletter.
Pavers and grass garden paths
A grassy area is beautiful. It is not suitable for heavy traffic such as loaded wheel barrels. By adding attractive pavers such as brick, slate, or concrete stepping stones, you can have both beauty and functionality!

Light up your outdoor area
light up your outdoor areaTip: If you are looking to light up your outdoor area using a hidden lighting tool, be sure to keep the light fixtures resistant to moisture, rain and snow. I would recommend consulting with a professional in this field.